
Can Kitchen Cupboards Be Painted?
Giving your kitchen a fresh, new look doesn't always require a full-scale renovation. If you're wondering whether your existing kitchen cupboards can be painted, the answer is a resounding yes. Painting your cupboards is a cost-effective and transformative way to update your space. With the right preparation and materials, you can achieve a durable, beautiful finish that completely revitalizes your kitchen.
This guide will walk you through everything you need to know, from prepping your surfaces to choosing the best paint. We'll cover the essential steps to ensure a professional-quality result that lasts.
Why Paint Your Kitchen Cupboards?
Painting is a popular choice for homeowners looking to refresh their kitchen without the expense and hassle of a complete tear-out. It allows you to customize the color and style of your kitchen, whether you're aiming for a modern, classic, or eclectic look. A fresh coat of paint can instantly brighten a dark kitchen, make a small space feel larger, and increase your home's overall appeal.
The Importance of Proper Preparation
The key to a flawless and long-lasting paint job lies in the preparation. Skipping these crucial steps can lead to peeling, chipping, and an uneven finish. Proper prep ensures that the paint adheres correctly to the surface, creating a smooth and durable coating that can withstand the daily wear and tear of a busy kitchen.
Step 1: Clean the Surfaces Thoroughly
Kitchen cupboards accumulate grease, oil, and grime that can prevent paint from sticking. Before you do anything else, you must clean every surface meticulously.
Use a degreasing cleaner specifically designed for kitchens. A solution of warm water and trisodium phosphate (TSP) or a specialized cabinet cleaner works well. Apply the cleaner with a sponge or cloth, scrubbing gently to remove all residue. Pay special attention to areas around the handles and stove, as these tend to be the grimiest. After cleaning, wipe the cupboards down with a clean, damp cloth to remove any leftover cleaning solution and let them dry completely.
Step 2: Remove Doors, Drawers, and Hardware
For the best results, you need to work on a flat surface. Unscrew all the doors from their hinges and remove all drawers from the cabinets. Take off all handles, knobs, and other hardware. Place these small pieces in labeled bags so you know exactly where everything goes when it's time to reassemble. This step prevents drips and ensures you can paint every nook and cranny without obstruction.
Step 3: Sand for a Smooth Foundation
Sanding is a critical step that creates a slightly roughened surface for the primer and paint to grip onto. If you skip sanding, your new paint job is more likely to peel or scratch off easily.
Use a medium-grit sandpaper (around 120-grit) to scuff up the existing finish. You don't need to remove the old paint or varnish completely; you just need to degloss the surface. For flat areas, a sanding block or orbital sander will speed up the process. For detailed or curved areas, hand sanding is best. After sanding, wipe away all the dust with a tack cloth or a microfiber cloth dampened with mineral spirits.
Step 4: Prime for Adhesion and Durability
Primer is the bridge between the old surface and the new paint. It blocks stains, ensures even color, and provides a superior bond for the topcoat. Using a high-quality primer is essential for kitchen cupboards. Choose a stain-blocking, adhesion-promoting primer. Apply a thin, even coat to all surfaces—doors, drawer fronts, and cabinet frames. A small roller works well for flat surfaces, while a brush is better for detailed areas. Allow the primer to dry completely according to the manufacturer's instructions, which may take several hours. For an extra-smooth finish, you can lightly sand the primed surface with fine-grit sandpaper (220-grit) and wipe it clean before painting
.
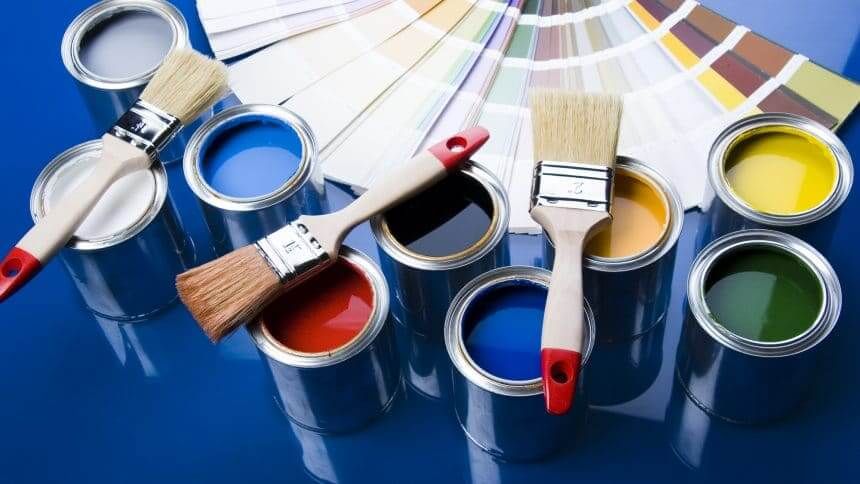
Choosing the Right Paint
Kitchen cupboards face a lot of use, so you need a paint that is tough, durable, and easy to clean. Look for paints specifically formulated for cabinets, trim, or high-traffic areas.
Types of Paint to Consider
● Acrylic Enamel Paint: This is a popular choice for cabinets. High-quality water-based acrylic enamels are low-odor, dry quickly, and clean up easily with soap and water. They cure to a hard, durable finish that resists stains and scrubbing.
● Oil-Based Enamel Paint: Traditionally known for their extreme durability and smooth finish, oil-based paints are still an option. However, they have a strong odor, take longer to dry, and require mineral spirits for cleanup.
● Cabinet and Trim Paint: Many paint brands now offer specialized paints designed just for cabinets and trim. These are often self-leveling, which helps minimize brush marks, and cure to a very hard, factory-like finish.
No matter which type you choose, opt for a satin or semi-gloss sheen. These finishes are easier to wipe clean than matte or eggshell sheens, which is a significant advantage in a kitchen environment.
Ready for a Flawless Finish?
Painting kitchen cupboards is a rewarding project, but it requires patience, precision, and a lot of detailed work. From thorough cleaning and sanding to careful priming and painting, every step is crucial for achieving a finish that looks great and stands the test of time.
If you want a guaranteed professional result without the time and effort, consider hiring experts. The team at Peninsula Painting specializes in cabinet painting and can help you achieve a flawless, durable finish. We use high-quality materials and proven techniques to transform your kitchen cupboards, giving your space the beautiful update it deserves. Contact us today to learn how we can help with your kitchen project.